First steps with your trackle fertility tracker
The first steps are best taken together. That’s why we have summarized everything you need to know when it comes to putting the trackle into operation.
We’ll start from the very beginning with the first login, pairing your sensor and how you start measuring. We will explain how to insert and remove the sensor, how trackle evaluates, and explain your daily trackle routine to you.
This is how you log in – step by step
- Download the trackle app from the Apple App Store or Google Play Store.
- Open the app and go to „Create a new account“.
- Enter your email address and click „Next.“
- Now you will write a password, very important: save it somewhere!
- Click „Yes“ and enter your password in the next step.
- By clicking „Next“, you will be logged in and able to pair your sensor.
How to pair your sensor - step by step
- After login, the app will prompt you to add a sensor. If you have an Android cell phone, activate the location services in addition to Bluetooth and the Internet and allow the trackle app to access your location.
- Take the sensor out of its box and open the trackle app.
- Put it back in the box to start pairing.
- Your sensor will now flash three long and two short flashes – after that it will be visible in the app.
- Click on “Pair Sensor“ – your sensor will then be registered and paired.
This video is embedded in the extended data protection mode of Youtube, which blocks the setting of Youtube cookies until an active click on the playback occurs. By clicking on the play button, you consent to Youtube setting cookies on the device you are using, which may also be used to analyze user behavior for market research and marketing purposes. You can find more details on the use of cookies by Youtube in Google’s cookie policy at https://policies.google.com/technologies/types?hl=de.
How and when do you start measuring?
Congratulations, you are now logged in and your trackle is ready to measure!
But when and how do you actually start?
Especially at the beginning you should wear the sensor every night if possible so that it can collect meaningful data.
It doesn’t matter if you don’t wear it for a night, but try to wear it every night if possible.
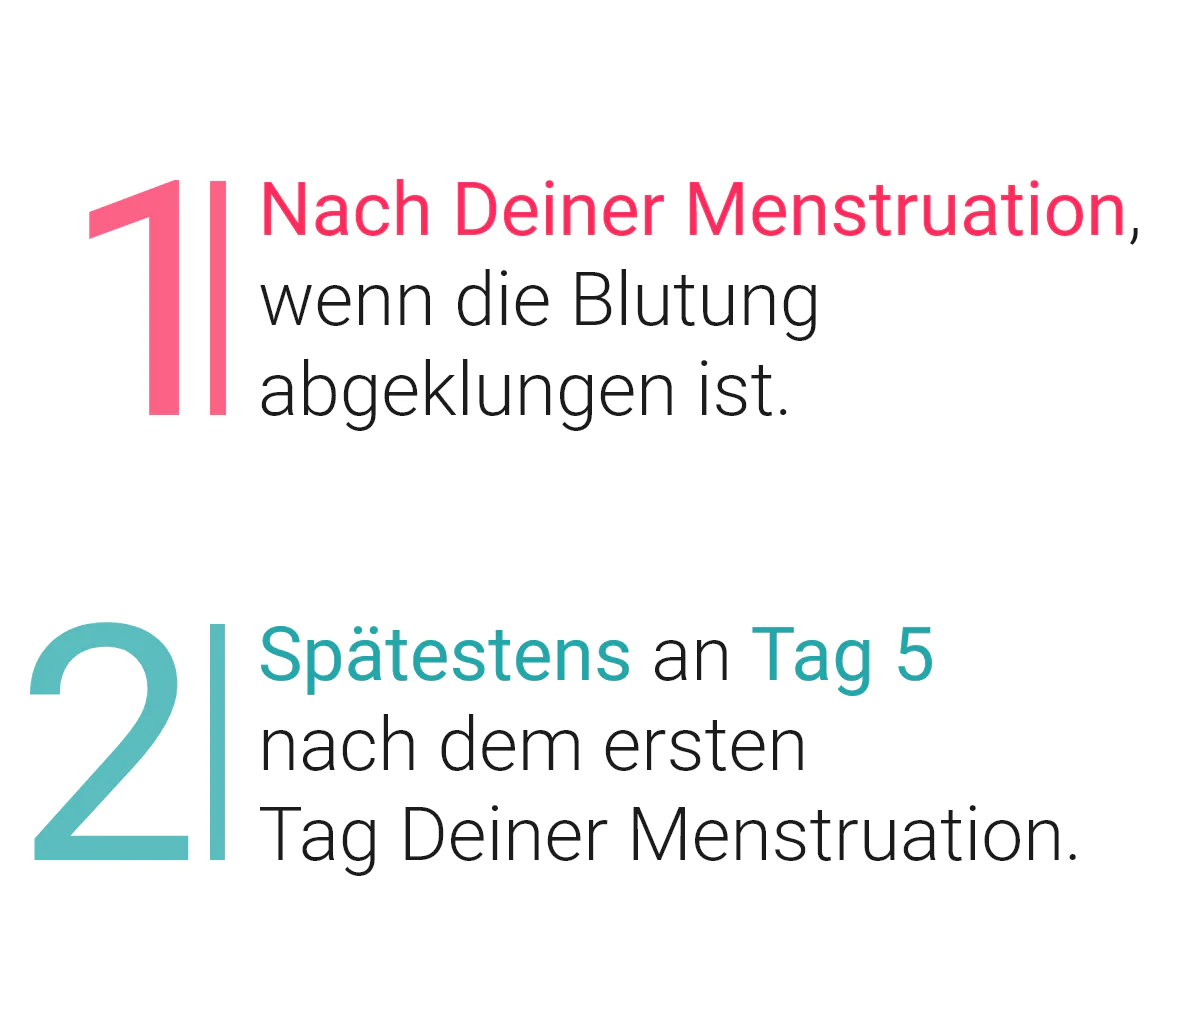
Start measuring after your menstrual period. The measurement should begin when the bleeding has stopped. You should start on day 5 of your cycle at the latest, i.e. five days after the first day of menstruation.
Don’t worry: If you are still bleeding slightly, you can use your trackle, in combination with a pad, for example.
How long do I have to measure every night? May I remove the sensor in between?
In order for trackle to determine your basal value you should wear the trackle sensor for at least 4 hours while you sleep. You can remove the sensor in between when you need to go to the bathroom or have sex. trackle can simply exclude these small measurement pauses from the calculation.
Do you still have data from your previous menstrual period?
If you still have data from your last menstrual period at hand, you can add it to the app before your first measurement. On the corresponding day you simply enter your bleeding strength. The same applies to data about your cervical mucus. As soon as you enter something, the first trackle cycle begins. And as soon as one cycle is completed, you will receive your forecasts.
How do you remove the trackle? - Tips and tricks
Remove the sensor in the morning when you get up. It may take some practice, but it gets easier with time. As you can see in the photo, in a position that is comfortable for you, insert two fingers – preferably thumb and forefinger – into the vagina and grasp the sensor at its bridge.
Then just pull out!
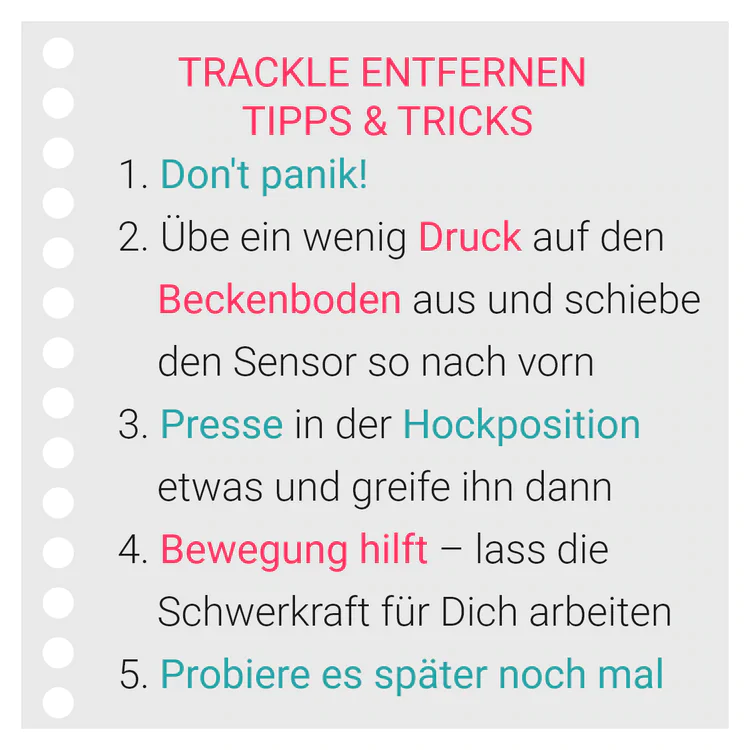
What do you do if you can't get the trackle out?
First of all: Don’t panic!
The sensor cannot be lost and you will definitely be able to remove it.
One trick is to push it forward so that you can grab it better. This is easily done by exerting a little pressure with the pelvic floor – similar to having a bowel movement.
Another trick is to push a little while in the squat position and then grab it. You can also let gravity work for you and move around a bit.
Sometimes it also helps if you just try it a little later.
What you should always know: It is absolutely not bad for your health if the sensor stays in for more than one. Nothing can happen or anything can break.
Your daily trackle routine
The daily routine actually begins in the evening: when the sensor is inserted
- Take your sensor out of the white storage box.
- Check if the trackle is damaged anywhere - if you find any deformation or damage, you must not use it.
- You insert the trackle into the vagina like a tampon - if it is in the right place, you should no longer feel it.
- Now off to bed and good night! The sensor measures while you sleep.
- Remove the sensor in the morning after getting up: To do this, insert two fingers into the vagina in the position that is most comfortable for you and grab the sensor at the bottom of its bridge.
- Now clean the sensor with soap and water and dry it.
Now it's time to transfer your data - and it works like this:
- Bluetooth and WIFI activated.
- With an Android smartphone: GPS activated.
- Open the trackle app and go to the yellow tab.
- Now place your trackle in the storage box with the recessed grip facing up.
- Wait until the sensor has synchronized.
- Observe your cervical mucus several times throughout the day and enter the best quality that you were able to observe into the app in the evening.
- The sensor and app do the rest!
How to clean your trackle
Clean your trackle with plenty of water or use a little soap immediately after removing it, before transmitting the temperature to the app. When using soap, however, make sure that no soap residue remains on the outer surface.
It is important that you do not use harsh detergents or abrasive products to clean your trackle. If necessary, you can also disinfect your trackle, but this is not mandatory. To do so, please follow the cleaning instructions in the user manual.
How to observe the cervical mucus
For the evaluation of your cycle, trackle needs your input on the cervical mucus.
Observe your cervical mucus daily and take a close look at it: What does it look like? Is it slippery or slithery? What color is it? How does the vaginal entrance feel? Is it dry, moist or maybe even wet?
Enter your observations in the app. Here you will find an explanation of the individual abbreviations in the app:
This video is embedded in the extended data protection mode of Youtube, which blocks the setting of Youtube cookies until an active click on the playback occurs. By clicking on the play button, you consent to Youtube setting cookies on the device you are using, which may also be used to analyze user behavior for market research and marketing purposes. For more information on the use of cookies by Youtube, please refer to Google’s cookie policy at https://policies.google.com/technologies/types?hl=de.
When does trackle evaluate: Explanation of forecasts and evaluation
trackle evaluates according to the rules of the symptothermal method.
Every day, trackle uses your cervical mucus and basal body temperature entries to check where you are in your cycle and whether or not your ovulation has already occurred.
In order to evaluate your cycle, trackle needs your cervical mucus, your menstruation and your basal body temperature entries.
Your ovulation has taken place when your body has reached the temperature peak and when your cervical mucus has changed from the very best quality back to poorer quality. Here you can read the exact rules again.
You want to learn more about the cycle curve and what the individual symbols mean? Then take a look at our legend!
This is what your first cycle looks like BEFORE the evaluation
In the first cycle, trackle does not know you and your cycle yet and therefore shows you “Today is a fertile day” - until enough information has been collected to perform a recalculation.
Every day trackle checks your entries for cervical mucus and your basal body temperature to find out whether you have ovulated yet.
For evaluating your cycle trackle therefore requires your input of cervical mucus, your menstrual input and your basal temperature. As soon as ovulation has been detected according to the rules of the symptothermal method, the display in your app will change accordingly.
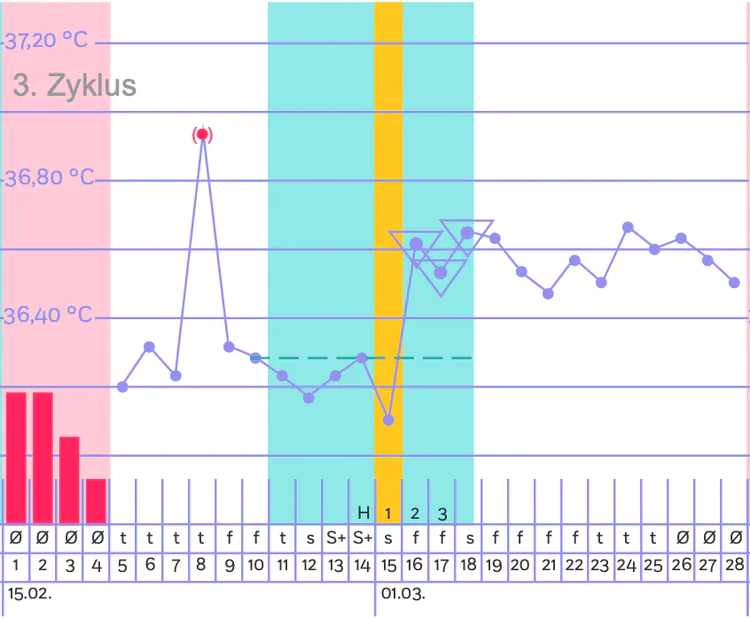
This is what your cycles look like AFTER trackle has detected ovulation
As soon as trackle has evaluated your temperature peak and your cervical mucus peak, you will see your ovulation. The turquoise marked days around your ovulation indicate when you were actually fertile. The yellow color marks the day of ovulation.
Starting with your 2nd cycle, trackle also shows you a cycle forecast in the calendar view. Here trackle shows you when your ovulation will probably take place in the next cycles.
Important: the forecasts are not a basis for contraception! If you use trackle for contraception, please check your fertility status on the start screen every day. Only the current, daily display may be the basis for your contraception decision!
The fertile window
When exactly are you fertile?
The egg cell can only be fertilized for 12 to a maximum of 18 hours after ovulation. However, the body has found an ingenious way to extend this period: the cervical mucus changes its consistency around ovulation due to the hormone estrogen – it becomes drwable and increasingly resembles the appearance of egg white.
This protein-like cervical mucus changes the pH of the vagina and allows sperm to survive in the female body for up to 5 days.
You are actually fertile only in your fertile time window, i.e. 4 days before ovulation, the day of ovulation itself, and 2 days after.
This video is embedded in the extended data protection mode of Youtube, which blocks the setting of Youtube cookies until an active click on the playback occurs. By clicking on the play button, you consent to Youtube setting cookies on the device you are using, which may also be used to analyze user behavior for market research and marketing purposes. For more information on the use of cookies by Youtube, please refer to Google’s cookie policy at https://policies.google.com/technologies/types?hl=de.